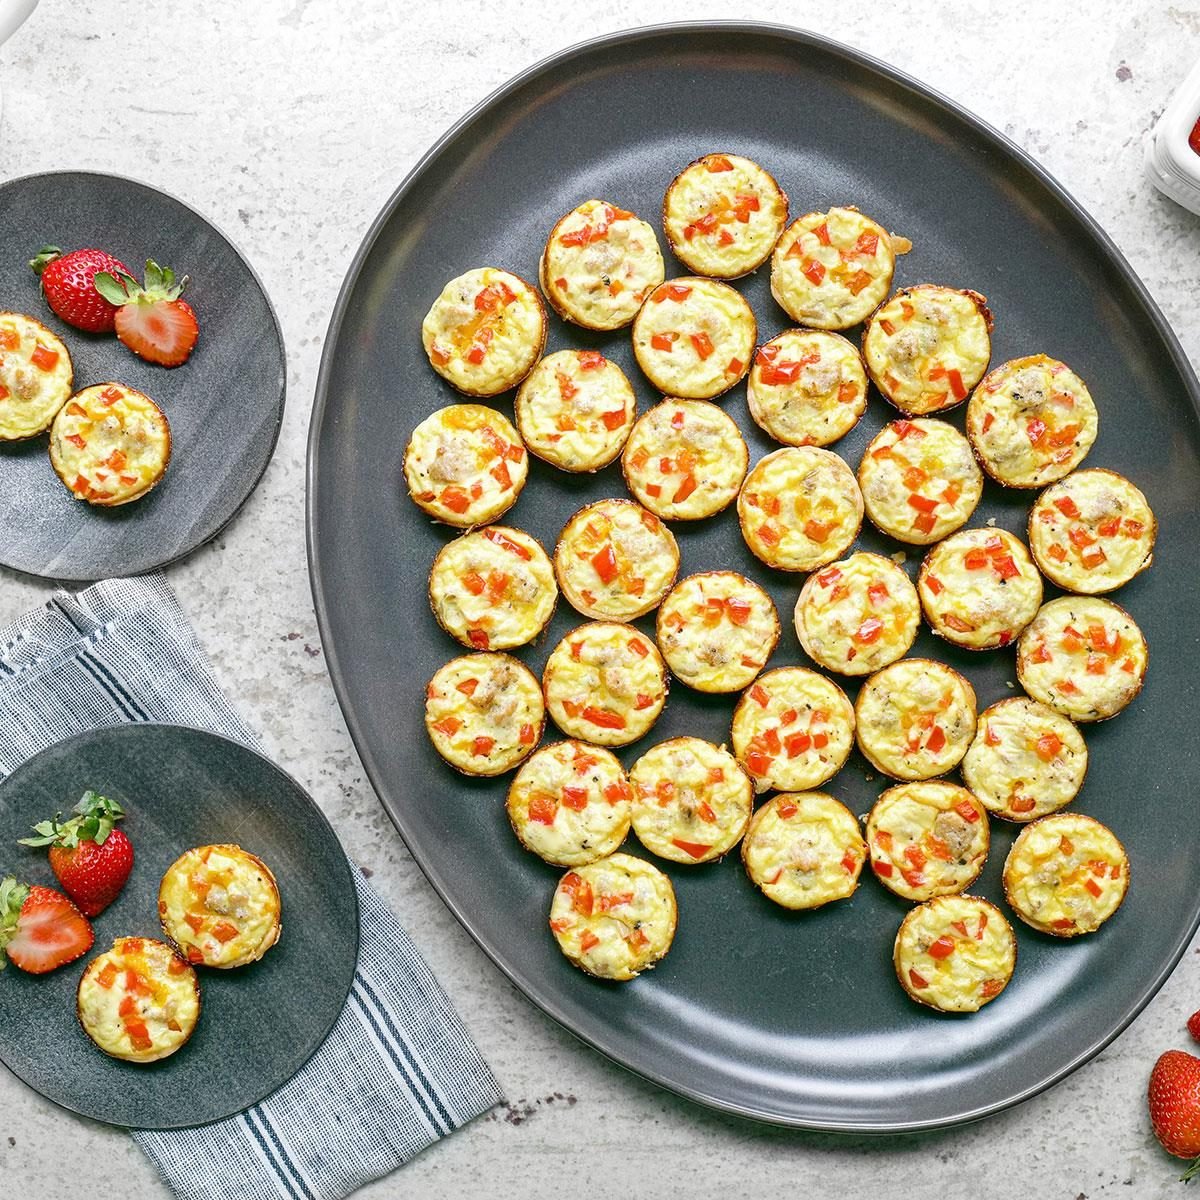
Imagine a culinary chameleon: an elegant bite-sized appetizer, a hearty addition to your brunch spread, or a quick, protein-packed breakfast on the go. This isn't a fantasy; it's the humble yet mighty mini quiche. These delightful two-bite morsels, with their flaky crust and rich, custardy filling, have earned their place as a beloved staple for countless occasions. Whether you're hosting a sophisticated soirée, prepping for a busy week, or simply craving a savory treat, mini quiches offer an unbeatable combination of convenience, versatility, and undeniable deliciousness.
Everyone adores miniature foods, from tiny meatballs to slider burgers, and mini quiches are no exception. They possess an irresistible charm that makes them disappear from platters in record time. But their appeal goes beyond mere cuteness; it's their adaptability that truly sets them apart. Unlike their larger, traditional counterparts, mini quiches are perfectly portioned, incredibly easy to customize, and remarkably simple to prepare, even for novice cooks. Get ready to discover why these tiny tarts are about to become your new favorite kitchen secret.
Why Mini Quiches Are Your Culinary Secret Weapon
What makes the mini quiche such a powerhouse in the kitchen? Its unparalleled versatility and convenience. These aren't just a single-purpose dish; they seamlessly transition between various roles, making them indispensable for anyone looking to simplify their cooking without sacrificing flavor or elegance.
- The Ultimate Appetizer: Passed around at a party or artfully arranged on a buffet, mini quiches elevate any gathering. Their bite-sized nature means no forks are needed, making them the perfect finger food that's both refined and satisfying.
- Brunch Bonanza: As the star of a brunch spread, mini quiches bring a touch of class and a burst of savory flavor. They complement everything from fresh fruit and pastries to mimosas, offering a substantial yet delicate option that caters to all tastes.
- Breakfast Hero: For those chaotic mornings, a batch of pre-made mini quiches is a lifesaver. Grab one (or two!) from the fridge or freezer, a quick reheat, and you have a wholesome, protein-rich breakfast that beats any drive-thru option.
- Snack & Meal Prep Superstar: Need a quick pick-me-up during the day? A mini quiche hits the spot. They are also incredibly freezer-friendly, allowing you to whip up a large batch and store them for future cravings, making meal prep a breeze.
The beauty of the mini quiche lies in its ability to deliver all the rich, creamy goodness of a full-sized quiche in a more manageable, quicker-cooking format. While traditional quiches require slicing and often come with a longer baking time, mini quiches cook faster and are inherently portion-controlled. This distinction makes them particularly advantageous for busy households and entertaining. For a deeper dive into the advantages of smaller bites for convenience and meal planning, explore the benefits of Mini Quiche vs. Traditional: Why Tiny Bites Rule for Meal Prep.
The Building Blocks: Essential Ingredients for Perfect Mini Quiches
Creating sensational mini quiches starts with understanding their fundamental components. Each ingredient plays a crucial role in achieving that perfect balance of flaky crust and custardy filling.
Flaky Crust: The Foundation of Flavor
The crust is the first impression of your mini quiche, offering that delightful crunch before the savory filling. While making pastry from scratch is a rewarding endeavor, convenience often dictates the choice, especially when aiming for 36 mini quiches:
- Refrigerated Pie Crust: This is the ultimate time-saver. Three sheets of refrigerated pie crust will typically yield around 36 mini quiche shells, making the process incredibly efficient. Look for good quality butter-based crusts for the best flavor.
- Homemade Pastry: If you prefer to go the artisanal route, a classic butter pie pastry is ideal. The effort is worth it for an extra layer of richness and flakiness. Expert Tip: Ensure your homemade dough is thoroughly chilled before rolling and cutting to prevent shrinking and achieve maximum flakiness. Blind baking the crusts for 5-7 minutes before adding the filling can also help prevent a soggy bottom, especially with wetter fillings.
Once you have your dough, rolling it to about 1/8-inch thickness and using a 2-1/2-inch round cutter will create the perfect base. Press these circles firmly into greased miniature muffin cups, ensuring they adhere well to the bottom and sides. Chilling these formed crusts for at least 30 minutes is a critical step; it helps the butter in the dough firm up, preventing excessive shrinkage during baking.
The Custardy Filling: Heart of the Quiche
The rich, savory filling is what defines a quiche. Achieving that perfect custardy texture is key:
- Eggs: The star of the show! For the fluffiest, most tender filling, give your eggs a really good whisk with the other liquid ingredients. You want to see them light, airy, and a bit bubbly before pouring. This incorporates air, contributing to a lighter texture.
- Half-and-Half: This dairy product is your secret weapon for that ideal custardy consistency – rich enough to be creamy but light enough not to feel heavy. If half-and-half isn't available, you can easily create your own by mixing equal parts whole milk and heavy cream. Alternatively, using just milk will result in a lighter quiche, while heavy cream will produce a denser, richer filling.
- Seasoning: A generous pinch of salt and freshly ground black pepper are essential. Many traditional quiche recipes also benefit from a tiny grating of nutmeg, which beautifully complements the dairy and eggs, adding a subtle warmth and depth.
Unleash Your Inner Chef: Customizing Your Mini Quiche Flavors
One of the most exciting aspects of making mini quiches is the freedom to customize. The base recipe is a blank canvas, inviting you to experiment with a myriad of flavors, textures, and ingredients. This flexibility is what makes them truly special for any meal or occasion.
Cheese Choices: A World of Savory Delights
Cheese adds a layer of richness and flavor complexity to your quiches. Don't be afraid to mix and match:
- Cheddar: A classic for a reason, offering a sharp, familiar tang.
- Swiss: Provides a nutty, slightly sweet counterpoint.
- Pepper Jack: For those who love a little heat and creaminess.
- Feta: Salty, tangy, and crumbly, perfect with Mediterranean-inspired mix-ins.
- Gruyère: A sophisticated choice, bringing deep, earthy notes.
Consider the overall flavor profile you're aiming for. A blend of two cheeses often yields the most interesting results.
Mix-Ins: The Sky's the Limit
This is where your creativity truly shines. Cooked mix-ins are sprinkled over the cheese before the egg mixture is poured. Remember to limit total mix-ins to about 1 cup for 36 mini quiches to ensure the filling sets properly and the crust doesn't become waterlogged.
- Meats: Crumbled bacon (a perennial favorite!), diced ham, cooked sausage, smoked salmon, or even shredded chicken. Ensure all meats are fully cooked and excess fat is drained.
- Vegetables: The possibilities are endless!
- Spinach: Always wilt and squeeze out all excess water to prevent sogginess.
- Mushrooms: Sauté them first to deepen their flavor and remove moisture.
- Onions & Bell Peppers: Sautéing them until tender and slightly caramelized adds wonderful sweetness.
- Asparagus: Blanch or lightly steam before dicing.
- Sun-dried Tomatoes: Chop finely for bursts of intense flavor.
- Broccoli: Steam or roast small florets until tender-crisp.
- Herbs & Aromatics: Fresh chives, parsley, dill, thyme, or a touch of garlic powder can elevate the entire dish.
For inspiration on crafting unique flavor combinations and personalized recipes, check out our guide on Easy Mini Quiche Recipe: Customize Flavors for Any Event.
Baking Your Bites: A Step-by-Step Guide
With your ingredients prepped and your muffin tins ready, it's time to bring your mini quiches to life in the oven. Precision and attention to detail during baking will ensure a perfect result every time.
- Preheat & Prepare: Begin by preheating your oven to 400°F (200°C). Generously grease your nonstick miniature muffin cups. You'll typically need enough tins for 36 mini quiches, so plan accordingly. If you don't have enough, you can bake in batches.
- Crust Placement: On a lightly floured surface, roll out your dough to 1/8-inch thickness. Using a 2-1/2-inch round cutter, cut out 36 circles. Carefully press each circle into a muffin tin, ensuring the dough covers the bottom and sides evenly. Chill these prepared crusts in the refrigerator for at least 30 minutes.
- Layer the Fillings: Once chilled, sprinkle your chosen cheese over the bottom of each crust. Follow with your cooked mix-ins, distributing them evenly. Remember, don't overfill!
- Prepare Egg Mixture: In a large bowl, whisk together your eggs, half-and-half (or chosen dairy), salt, and pepper (and nutmeg, if using) until the mixture is light, fluffy, and thoroughly combined.
- Pour & Bake: Carefully pour the egg mixture into each prepared cup, filling them to about three-fourths full. Then, reduce your oven setting to 325°F (160°C). Place the muffin tins on a lower oven rack and bake for 30 to 35 minutes.
- Check for Doneness: The quiches are ready when a knife inserted into the center comes out clean, and the crusts are a beautiful golden brown. The filling should appear set and slightly puffed.
- Cool & Serve: Allow the mini quiches to cool in the pan for 10 minutes before gently removing them. This cooling period helps them firm up and makes removal easier. Serve them warm for the best experience.
Pro Baking Tip: If you're baking in batches, keep the remaining dough and filling refrigerated between uses. This maintains the integrity of the crusts and the freshness of the filling.
Beyond the Oven: Serving, Storing, and Enjoying Mini Quiches
Your delicious batch of mini quiches is baked, golden, and fragrant. Now, let's talk about how to make the most of them, from presentation to preservation.
Serving Suggestions
Mini quiches are incredibly versatile in how they can be served:
- Warm: Fresh out of the oven after the cooling period, they are at their peak, with flaky crusts and a molten, custardy interior.
- Room Temperature: They hold up beautifully at room temperature for several hours, making them ideal for buffets and potlucks.
- Chilled: Some people even enjoy them chilled, especially on a hot day or as part of a cold appetizer spread.
Garnish with fresh herbs like chopped chives or parsley just before serving for an extra touch of color and freshness. A sprinkle of paprika can also add visual appeal.
Storage and Reheating
The make-ahead and freezer-friendly nature of mini quiches is one of their biggest advantages:
- Refrigeration: Cooled mini quiches can be stored in an airtight container in the refrigerator for up to 3-4 days.
- Freezing for Later: To freeze, allow the quiches to cool completely. Then, arrange them in a single layer on a baking sheet and freeze until solid (this prevents them from sticking together). Once frozen, transfer them to a freezer-safe bag or container, removing as much air as possible. They can be stored for up to 2-3 months.
- Reheating:
- From Refrigerator: Reheat in a preheated oven at 300°F (150°C) for 10-15 minutes, or in a microwave for 30-60 seconds (though the crust may lose some crispness).
- From Freezer: For best results, reheat frozen quiches in a preheated oven at 325°F (160°C) for 20-25 minutes, or until thoroughly heated through and the crust is crisp.
Having a stash of these delightful bites in your freezer means you're always ready for an unexpected guest, a sudden brunch craving, or a week of hassle-free breakfasts.
From their elegant presentation to their customizable fillings and incredible convenience, mini quiches truly are a culinary marvel. They effortlessly bridge the gap between sophisticated entertaining and practical everyday meals, making them an invaluable addition to any home cook's repertoire. Whether you're experimenting with bold new flavors or sticking to time-tested classics, these two-bite wonders are guaranteed to delight. So, roll out that dough, whisk those eggs, and get ready to enjoy your new go-to appetizer, brunch, and breakfast solution!
